Overview
Typcially, if you've installed something in your concrete5 site, you've done so by assigning its license to your project page on concrete5.org, then downloading and installing it through your dashboard. It's generally a very seamless process that doesn't even require a user to touch the files they're installing!
However, if your site's hosting environment blocks your site from accessing the concrete5.org Marketplace directly, you may need to install and update add-ons manually as a workaround. (Additionally, some developers prefer to manage updates manually, to allow greater control over what their clients have at their disposal when editing a site.)
Installing a concrete5 add-on manually is a little different from the usual routine, but it's still relatively painless. We'll eventually install the add-on through the dashboard as normal, but we'll first need to employ alternate means of downloading the add-on or theme's code and uploading it to your site.
First, you'll need to download a copy of the add-on's source files. On concrete5.org, an add-on or theme's source files are available whenever a license is not assigned to a project. If the license is assigned, you'll need to temporarily release it from your project.
After downloading a copy of the package to your local computer, you can then upload the archive it to your website. After extracting it, you will need to copy the folder to the packages directory of your site. It will then become available to install by visiting Dashboard > Extend concrete5. Here's a step-by-step breakdown:
Step 1: Make sure the license is available
- Log in to concrete5.org.
- Visit your Licenses page to view a list of everything you've purchased with your user account.
- Find your add-on in the list, and make sure at least one instance of the license is not assigned to a project:
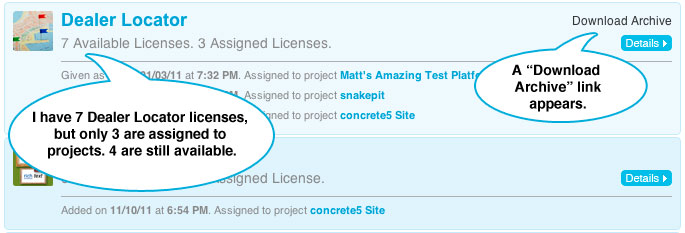
If you have one or more copies of a license that are not assigned to a project, a "Download Archive" link will be present over on the right hand side of the row. Click this link to download a zip archive that contains all the files included in the package.
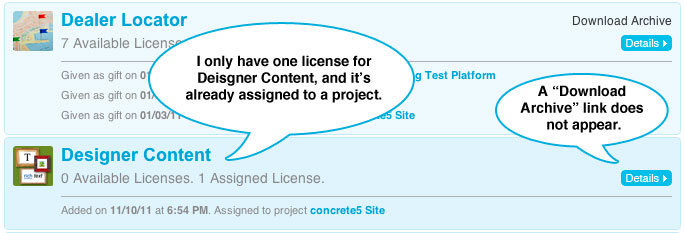
If your license is assigned to a project, you'll need to visit the project page that the license is assigned to, locate the license and click the "Release from Project" button.

Once the add-on has been released, return to your Licenses page and locate the "Download Archive" link as outlined above.
Step 2: Upload the archive to your site
We recommend uploading the entire zip archive to your site's /packages/ folder before extracting it. This ensures that all the files arrive safely. Uploading an extracted folder via FTP is often problematic due to failed file transfers.
Step 3: Extract the zip archive
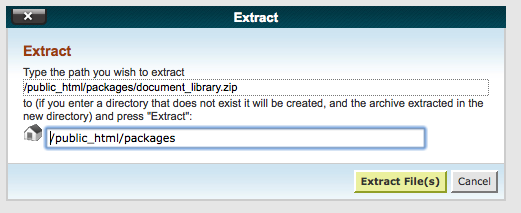
Once your zip archive is in the /packages/ folder, log into your hosting control panel's File Manager to extract it. Here's what it would look like if your hosting company uses cPanel:
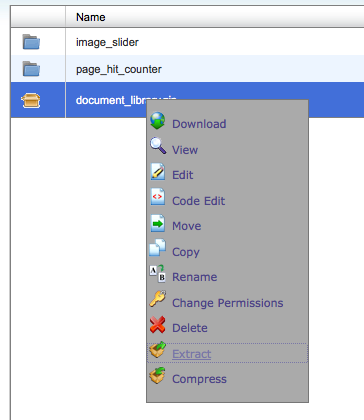
If your hosting company uses a different control panel software (Plesk, etc), this process will be somewhat different.
Once extracted, the zip archive can be deleted from the /packages/ folder.
Step 4: Complete installation from your site's Dashboard
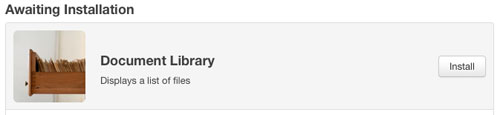
Go to Dashboard > Extend concrete5. Your add-on should be available as "Downloaded and Ready to Install".
Updating add-ons manually
To update an installed package to a new version, follow a similar process. Temporarily un-assign the license as described above and download the add-on from your licenses page. You'll be served the latest version of the add-on, regardless of what version of concrete5 you're running on your site.
In the next couple of steps, we'll effectively going to replace the old package's folder with the new one. Move the existing ("old version") add-on's folder out of packages/ and put it somewhere else for safekeeping. Now extract the zip archive of the new version you've downloaded into packages/, right where the old one used to be.
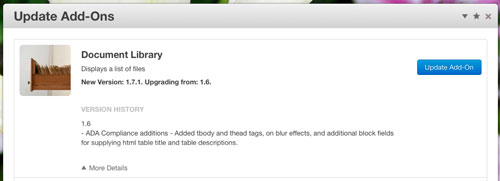
Now we need to apply the update from our site's Dashboard. Go to Dashboard > Extend concrete5 and you should be notified that a new package has been downloaded and is ready to install.
After updating, it's a good idea to clear your site cache. It should also be noted that while you're moving the old version's files around, any pages that are currently using the add-on may very well be broken-- so if you're performing this task on a "live" / production site, it's best to get the process over with as soon as possible.