by t00thless
This guide is meant to be a beginners Windows install how to using WampServer and Concrete. I am no security expert! A good starting point is the WampServer forums for getting your server secure. I wanted to evaluate concrete on my computer and this is how I did it.
Download WampServer
As of writing this, I am using: WampServer 2.0f [12/16/08]
Includes :
- Apache 2.2.11
- MySQL 5.1.30
- PHP 5.2.8
Installing Wamp is very easy. Just a few clicks and it is done. I used the default install directory of C:\wamp. If you have a software firewall and it prompts you, allow Apache. Fill in the PHP mail parameters if you want that feature and have access to a mail server. Launch Wamp at the end of the install.
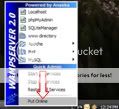
Now, put Wamp Online. In the systray, click and select Put Online. After a few seconds, it will be running. You can test by putting http://localhost/ in your browser. If a WampServer page comes up, you’re up and running.
Download Concrete
As of writing this, I am using: Concrete5-5.2.1
Extract the zip file anywhere. Rename the concrete5.2.1 folder to concrete (rename the internal concrete5.2.1 folder if you have a sub concrete5.2.1 folder). Move the concrete folder inside the wamp\www folder. In this example, I used C:\wamp\www\concrete.
Launch PHPMyAdmin.

PHPMyAdmin warns you that you have not set a SQL password. So, let’s do that. Click Privileges at the top of PHPMyAdmin. And then click Edit Privileges.

At the bottom under ‘Change Password’, type your new password in twice and strike the ‘Go’ button. I will use password: mySQLpassword. Now PHPMyAdmin is broken. No worries, that is easy to fix. Update config.inc.php. In this example, the file is located in C:\wamp\apps\phpmyadmin3.1.1\. Near the bottom of the file, look for [‘password’]=’’; Add your password between the ‘’s. Like this: [‘password’]=’mySQLpassword’; PHPMyAdmin is
now happy.
Now to create the database. In this example, I will create a database called concrete. Click Server: localhost if you are not already at the screen below. Type concrete in the Create new database box and click the create button.

Now we have to install concrete. Put http://localhost/concrete in your browser. You will be greeted with the installer.

Just fill in the boxes. I will use Concrete as the site name, put in my email address, localhost as the server, root as the username, mySQLpassword as the password and concrete as the database name. Strike the install button and it will done in no time. Note your admin password that comes up after a moment. You can change that later easily, but be sure to record it.
I hope some folks found this guide useful.